3.3. Adding PXE Hosts
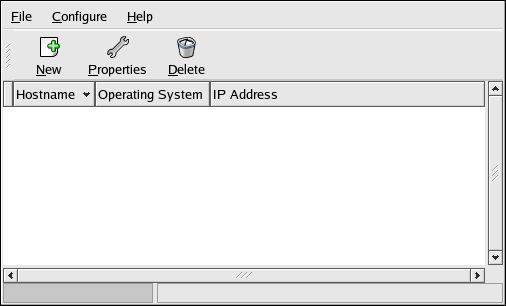
After configuring the network server, the interface as shown in Figure 3-2 is displayed.
The next step is to configure which hosts are allowed to connect to the PXE boot server. For the command line version of this step, refer to Section 3.3.1 Command Line Configuration.
To add hosts, click the New button.
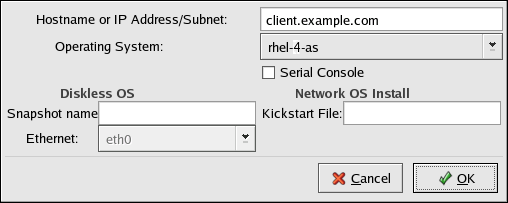
Enter the following information:
Hostname or IP Address/Subnet — The IP address, fully qualified hostname, or a subnet of systems that should be allowed to connect to the PXE server for installations.
Operating System — The operating system identifier to install on this client. The list is populated from the network install instances created from the Network Installation Dialog.
Serial Console — This option allows use of a serial console.
Kickstart File — The location of a kickstart file to use, such as http://server.example.com/kickstart/ks.cfg. This file can be created with the Kickstart Configurator. Refer to Chapter 2 Kickstart Configurator for details.
Ignore the Snapshot name and Ethernet options. They are only used for diskless environments. For more information on configuring a diskless environment, refer to Chapter 4 Diskless Environments for details.
3.3.1. Command Line Configuration
If the network server is not running X, the pxeboot utility, a part of the system-config-netboot package, can be used to add hosts which are allowed to connect to the PXE server:
pxeboot -a -K <kickstart> -O <os-identifier> -r <value> <host> |
The following list explains the options:
-a — Specifies that a host is to be added.
-K <kickstart> — The location of the kickstart file, if available.
-O <os-identifier> — Specifies the operating system identifier as defined in Section 3.2 PXE Boot Configuration.
-r <value> — Specifies the ram disk size.
<host> — Specifies the IP address or hostname of the host to add.
For more information on command line options available for the pxeboot command, refer to the pxeboot man page.

