6.3. Setting Up a MySQL Service
A database service can serve highly-available data to a MySQL database application. The application can then provide network access to database client systems, such as Web servers. If the service fails over, the application accesses the shared database data through the new cluster system. A network-accessible database service is usually assigned one IP address, which is failed over along with the service to maintain transparent access for clients.
An example of a MySQL database service configuration is as follows:
The MySQL server packages are installed on each cluster system that will run the service. The MySQL database files are installed on a shared GFS device. This allows the database data to be accessed by all cluster members. In the example, the file system is mounted as /var/lib/mysql, using the block device /dev/vg01/lvol5.
An IP address is associated with the MySQL service to accommodate network access by clients of the database service. This IP address is automatically migrated to the working cluster node in the event of failover. In the example below, the IP address is 10.1.16.12.
The script that is used to start and stop the MySQL database is the standard init script mysqld. If general logging of connections and queries is needed, edit the mysqld script to add the option --log=/var/log/mysqld.log as the last option to the safe_mysqld command. The resulting line should appear similar to the following (Note: the back slash (\) denotes the continuation of one line):
/usr/bin/safe_mysqld  --defaults-file=/etc/my.cnf --log=/var/log/mysqld.log \
	>/dev/null 2>&1 &
If the --log option is added to the mysqld script, the new mysqld script should be copied to the other cluster members that can run the MySQL service, so that they can log connections and queries if the MySQL service fails over to those members.
by default, a client connection to a MySQL server times out after eight hours of inactivity. This connection limit can be modified by setting the wait_timeout variable in the /etc/my.cnf file. For example, to set timeouts to four hours, add the following line to the [mysqld] section of /etc/my.cnf:
set-variable = wait_timeout=14400
Restart the MySQL service. Note that after this change is made, the new /etc/my.cnf file should be copied to all the other cluster members that can run the MySQL service.
To check if a MySQL server has timed out, invoke the mysqladmin command and examine the uptime. If it has timed out, invoke the query again to automatically reconnect to the server.
Depending on the Linux distribution, one of the following messages may indicate a MySQL server timeout:
CR_SERVER_GONE_ERROR
CR_SERVER_LOST
6.3.1. MySQL and the Cluster Configuration Tool
To add a MySQL service using the Cluster Configuration Tool, perform the following:
Add the init script for the MySQL application service.
Select the Resources property and click Create a Resource.
In the Resource Configuration dialog, select Script from the drop-down menu.
Enter a Name to be associated with the MySQL service.
Enter the path to the MySQL init script (such as /etc/init.d/mysqld in the File (with path) field.
Click OK.
Add an IP address for the MySQL service.
Select the Resources property and click Create a Resource.
In the Resource Configuration dialog, select IP Address from the drop-down menu.
Enter the IP Address to be associated with the MySQL service.
Make sure that the Monitor Link checkbox is left checked.
Click OK.
Add a device for the MySQL service.
Select the Resources property and click Create a Resource.
Select GFS from the drop-down menu.
In the Resource Configuration dialog, enter the Name for the resource (for example, mysql-data).
In the Mount Point field, enter the path to which the shared GFS device is mounted (/var/lib/mysql/).
In the Device field, enter the block device associated with the GFS share (/dev/vg01/lvol5).
Enter any mount point Options, (such as rw for read-write priveleges).
Click OK.
Click the Services property.
Add the MySQL service.
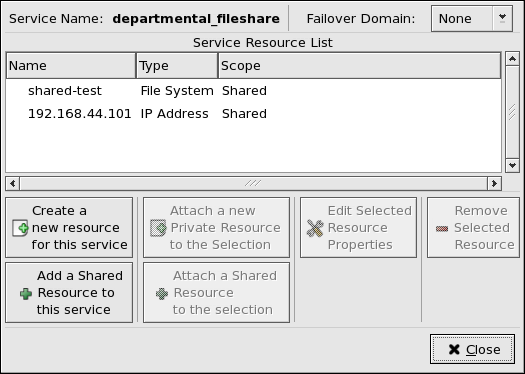
Click Create a Service. Type a Name for the service in the Add a Service dialog.
In the Service Management dialog, select a Failover Domain from the drop-down menu or leave it as None.
Click the Add a Shared Resource to this service button. From the available list, choose each resource that you created in the previous steps. Repeat this step until all resources have been added.
Click OK.
Choose File => Save to save the MySQL service configuration.
